This is a step-by-step guide that will show how to optimally set up a USB drive for Asus’ RMerlin powered routers that will at the very minimum allow for use of a swap file for your supported router. It will optionally install Entware properly too, all with the help of amtm by
@thelonelycoder. The world of scripts will soon become child’s-play with these powerful tools and allow to make your network, more your own.

The full power and control this will give you over your network and clients have not fully been understood yet, but do not worry! Time will give to those who wait. In return, please consider any contribution you can to those that create and continue to support these scripts for us. They really and truly deserve our full support, including
@RMerlin for providing such a powerful and stable platform for us to fully use and enjoy.
This guide will make a few assumptions to try to keep it as concise as possible. First, I am assuming that we are using a supported RMerlin Asus router. Second, I am assuming that your router is stable and is in a good/known state. Thirdly, I take no responsibility for what the following steps and scripts may potentially do to your router, your USB drive, or your network. Not that there is anything wrong with the steps or scripts as presented and used correctly, but I have no control over your use of these steps and scripts. Follow the steps closely, please ask questions if you need to ask, but the final decision and responsibilty to go ahead with this guide is yours alone. For support on these scripts, please use the appropriate thread that each developer has created for their script(s).
Hope this guide leads you a little more gently down the scripting path for some of the same rewarding discoveries I have found on it too. Let's begin.
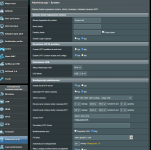
Enable JFFS custom scripts and configs
- Go to Administration and select the System Tab
- Click 'Yes' to the 'Enable JFFS custom scripts and configs' option
- Click USB Mode option to use 'USB 2.0'
- Enable SSH to 'LAN Only'
- Change SSH Port to '51111'. (Example port number)
- We want to use a different 'default' than Port '22'
- Anything between '49152 - 65535' is allowed for Dynamic and/or Private Ports
- Make sure 'Allow Password Login' is 'Yes'
- Set 'Enable SSH Brute Force Protection' to 'Yes'
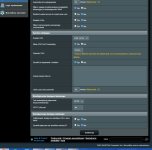
- Finally, make sure to hit the Apply Button at the bottom of the screen
Now, reboot the router, after it has booted up, wait at least 10 minutes for it to settle.
The CPU cores will be mostly idle when it is ready.


